What the get-up trains, and why it is slow
The get-up is a chain of positions rather than one movement. The arm holding the bell stays straight and vertical throughout, so that shoulder keeps a load steady overhead while your body moves underneath it, from lying to sitting, kneeling and standing. The trunk does most of the moving: the obliques and abdominals roll and lift you off the floor, the glutes drive the bridge and the stand, and the legs finish with what is in effect a lunge.
Nothing happens quickly and the load is modest, so the get-up is a strength and control exercise, not conditioning. It teaches you to keep a load stacked over a straight arm and to move between the floor and standing with control. It is a poor first kettlebell exercise: the kettlebell basics guide suggests learning it once your swing and press are steady, and the core training guide shows how holds, carries and lifts fill the rest of a core week.
Before the first rep: space, grip and the arm
- Clear a space about your own length plus an arm's reach on every side, away from benches and other people.
- Hold the bell with the handle running diagonally across your palm, so the ball rests on the back of your forearm and your wrist stays straight, knuckles to the ceiling.
- Lock the arm: elbow straight, shoulder drawn slightly down away from the ear. That straight, vertical arm is the rule for the whole get-up.
- Keep your eyes on the bell until you are kneeling upright. Watching it keeps the arm vertical and tells you at once when it drifts.
- Choose the load: no weight for your first sessions, then a bell clearly lighter than one you can press five times with one arm.
The get-up in seven steps
These steps hold the bell in the right hand; swap every left and right for the other side. Pause for a breath in each position before you move to the next.
- Roll and press. Lie on your right side facing the bell, grip the handle with both hands and roll onto your back with it at your chest. Press it up with both hands, then let the left hand go. Bend the right knee, foot flat near your hip; lay the left leg straight and slightly out to the side, and the left arm on the floor at an angle, palm down.
- Roll to the elbow. Push through your right heel and reach the bell towards the ceiling to roll up onto your left forearm. Lead with the chest, not the head, and keep the bell arm vertical.
- Post to the hand. Press from the forearm up onto your left hand with the arm straight, so you are sitting tall with your chest open. Coaches call this the tall sit.
- Bridge the hips. Drive through your right foot and left hand to lift your hips until your body forms a line from the right knee to the shoulders.
- Sweep the leg. Bring your left leg back underneath you and set the knee down below your hips, roughly in line with your left hand. You are now on one hand, one knee and one foot.
- Kneel upright. Lift your left hand off the floor and bring your torso upright into a half kneel. Turn the back foot so the shin points straight behind you, and look ahead now instead of at the bell.
- Stand. Drive through the front foot and stand up, as from the bottom of a lunge, with the bell still locked overhead. Stand tall for a breath.
To come down, reverse every step: step back into the half kneel, hinge to put your empty hand on the floor, sweep the leg through, lower the hips, slide back to the elbow, lie down, and bring the bell to your chest with both hands before you roll to the side to set it down. The way down deserves the same pauses as the way up.
Learn it with no weight, then use the half get-up
Most coaches teach the get-up without a load first, because the order of positions is the hard part. Practise the full movement with an empty fist pointing at the ceiling until you can go up and down on both sides without stopping to think. A popular check is to balance a shoe flat on top of that fist: if it falls off, your arm drifted from vertical.
Then add a light bell. When one step keeps going wrong, practise it on its own, such as the roll to the elbow or the leg sweep, before putting the chain back together.
The half get-up
The first half of the movement and back again: roll and press, roll to the elbow, post to the hand and, in most versions, the high bridge, then reverse to the floor. It trains the part where the shoulder and trunk work hardest with far less to coordinate, and many people use a slightly heavier bell for it than for the full get-up.
Get-up mistakes to fix first
| Mistake | What it looks like | The fix |
|---|---|---|
| Arm drifting off vertical | The bell travels towards your head or your feet as you move | Eyes on the bell, and stack it over the shoulder in every position |
| Bent elbow | The arm softens under the bell as you roll or bridge | Lock the elbow before the first step; go lighter if it still bends |
| Wrist bent back | The bell hangs behind the hand and the knuckles point backwards | Handle diagonal in the palm, knuckles to the ceiling |
| Rushing the steps | One position blurs into the next with no pause | A breath in each position, up and down |
| Low or skipped bridge | The hips barely lift, so the leg has no room to sweep through | Drive the hips up until knee, hip and shoulder line up |
| Back knee left sideways | The back shin points across the body as you stand | Turn the back foot so the shin points straight back before you rise |
If the bell gets away from you, let it fall to the side and move out of its way rather than trying to save it. If the overhead position pinches or hurts your shoulder, stop, and speak to a doctor or physiotherapist before you try again.
Who it suits, and who should start elsewhere
- It suits people who already press a kettlebell overhead with one arm, elbow straight and no lean, and who want slow, whole-body control work with a single bell.
- Start with its parts if getting down to the floor and back up is hard, or if you cannot yet keep a light weight overhead on a straight arm: a plank for the trunk, a lunge for the stand and the overhead press for the arm. The shoulder exercise guide shows where overhead work fits in a week.
- If your goal is conditioning, pick the kettlebell swing: the get-up is too slow to raise your heart rate much.
Reps, sets and the bell to use
| Goal | Sets × reps | How hard |
|---|---|---|
| Learning the sequence | 3–5 × 1 each side, no weight | Every position held for a breath; a shoe on the fist if you like |
| Building control | 3–5 × 1 each side, light bell | Smooth and quiet; both sides look the same |
| Half get-ups | 3 × 3 each side | A bell a little heavier than your full get-up |
| Strength | 5 × 1 each side, heavier bell | Long rests; stop while every step still looks the same |
Alternate sides every rep and rest as long as you need: a get-up is a slow lift, not a race. A few minutes of steady, alternating singles is a common way to practise.
Once or twice a week is plenty, early in a session or as a light warm-up before pressing. Progress the sequence, then the smoothness, then the bell. Kettlebells usually go up in big jumps, so add a set or slow each position before moving up, and return to half get-ups when a new bell feels unsteady.
Turkish get-ups at RPM
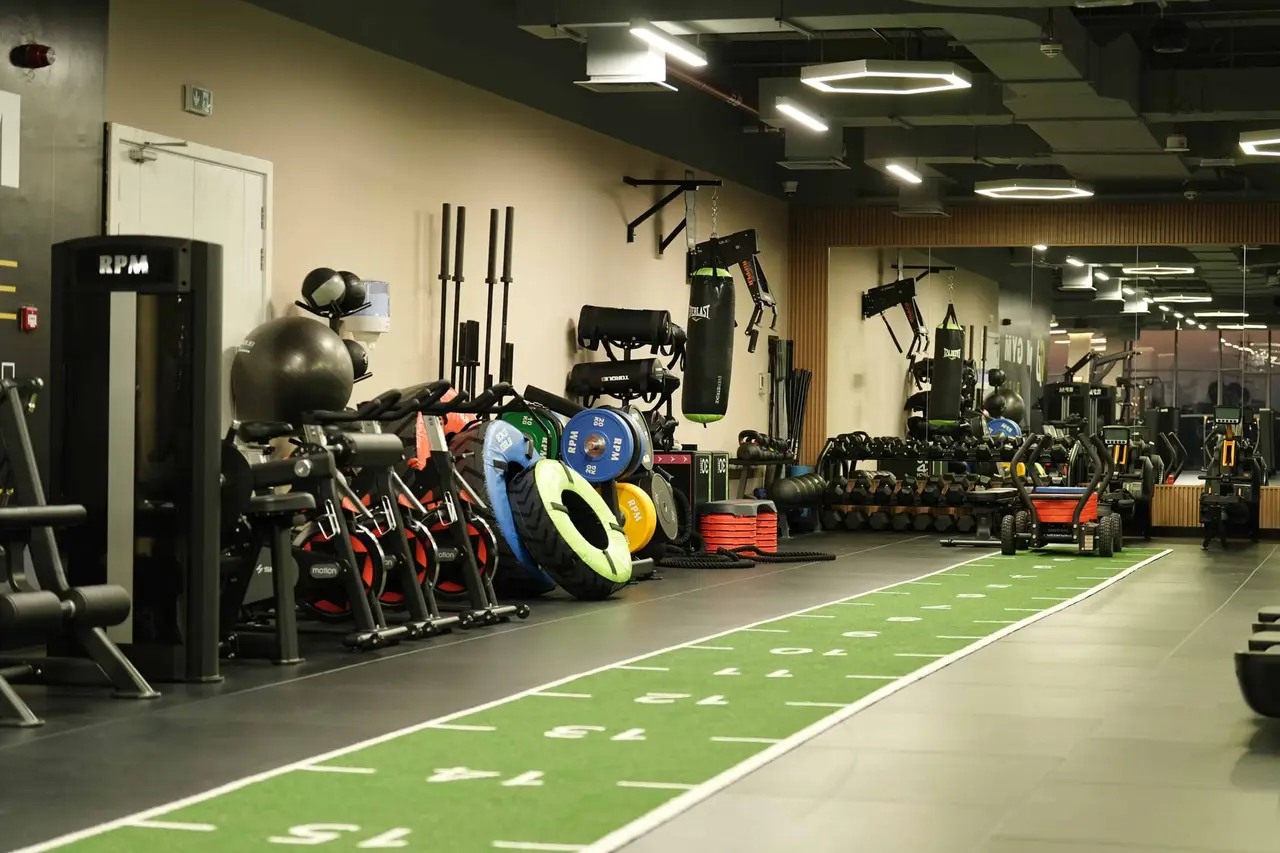
RPM's floor photos show kettlebells in the functional area, next to a turf lane with room to lie down, roll and stand. Ask on your free guided tour which bell sizes are on the rack, so you know the steps between them, and choose a spot where nobody will walk through your space. The sequence is far quicker to learn with someone watching: a personal training session can take you through it, and functional training at RPM covers the rest of the area.
Questions, answered.
What muscles does the Turkish get-up work?
Mainly the shoulder holding the bell, which works throughout, and the trunk muscles that roll and lift you off the floor. The glutes and legs drive the bridge and the stand, and the supporting arm carries your weight in the early steps.
What are the benefits of the Turkish get-up?
It trains you to hold a load steady overhead while your body moves under it, and to get from the floor to standing with control, with one bell and little space. It adds to strength work rather than replacing it.
How heavy should a Turkish get-up be?
Start with no weight at all, then a bell clearly lighter than one you can press five times with one arm. Move up only when every step is smooth on both sides.
Turkish get-up vs windmill: what is the difference?
Both keep a bell locked overhead. The windmill stays standing and pushes the hips out to the side so the empty hand reaches down towards the floor; the get-up travels all the way from lying to standing. Many coaches teach the get-up first and the windmill later.
Turkish get-up vs burpee?
They share only the trip between the floor and standing. A burpee is fast, unloaded and done for conditioning; a get-up is slow, loaded and done for control and strength. One does not replace the other.
Can I do a Turkish get-up with a dumbbell?
Yes, the steps are the same. A dumbbell sits balanced in the hand instead of resting on the forearm, which some people find steadier and others harder to keep still, so start lighter than with a kettlebell and keep the wrist straight.